

How to Colour Match Like a Pro with König
- Oct 29, 2025
- 2 min read
For professional repairers, the difference between a good job and a great one often comes down to colour matching. When repairing chips, scratches or surface damage, achieving a seamless colour match ensures the repair blends perfectly with the surrounding area, and that’s where König’s professional repair systems make all the difference.
Why Colour Matching Matters
A perfect match doesn’t just restore a surface, it restores confidence in your craftsmanship. Whether you’re repairing timber joinery, laminate cabinetry or stone benchtops, the goal is always the same: an invisible finish that looks original, not repaired.
Step-by-Step: Colour Matching with König
1. Prepare the surface
Clean the area thoroughly. Dust, wax or oils can affect adhesion and alter the perceived colour of your repair.
2. Assess under proper lighting
Examine the surrounding area in natural daylight if possible. Lighting conditions can change how colours appear, especially on textured or glossy surfaces.
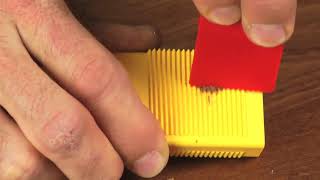
3. Select your base colour
Use König’s professional colour charts or pre-tinted fillers to identify the closest match. Our systems are designed so you can blend and adjust quickly onsite.
4. Fine-tune the mix
Make small pigment adjustments and test on a sample or hidden area. Minor tweaks often make all the difference to achieving a flawless blend.
5. Match the sheen
Once the colour is right, finish with the correct sheen level (matte, satin or gloss) to match the surrounding surface perfectly.
Perfect Results Every Time
Some surfaces can be tricky to match, aged timber, patterned laminates, or custom finishes can all vary in tone. That’s why König repair kits are designed for flexibility. Each kit includes a range of blendable colours, allowing professionals to mix and adjust directly onsite for a precise match.
With a little practice, you’ll be able to recreate even complex tones quickly and confidently, achieving results that look natural, durable, and completely seamless.
👉 Explore the full König range at konigaustralia.com
Pro Tips from the Field
Always evaluate colour after curing (some fillers deepen slightly as they set).
Keep notes of your successful mixes for repeat jobs.
Use König finish adjusters and clear coats for the best sheen alignment and durability.
With König’s professional repair kits, precise colour matching is straightforward, helping tradespeople deliver clean, invisible repairs every time.


Comments