Furniture Seller/Manufacture? Repair Damaged Edges On Furniture
If you sell or manufacture furniture you might need to read this. Transportation is where damage happens. When a product is delivered from a manufacturer and is damaged, that piece must be sent back to be replaced. Money and time is wasted. If a customer received a delivery of there furniture and it was damaged. The same thing again happens. Send back and replace the furniture.
Now if you're like me and think that is an absolute was of resources, then read on!
Konig repair kits are designed to be at every stage of company's process. Manufacturing, sales and point end delivery. The ability to repair a damage piece for a client on the spot is amazingly helpful to the client as they have just received an item that they bought with their hard earned money and it was damaged.
Let's take a look at how to repair this situation now.
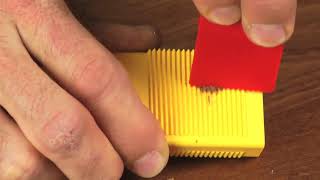
Step 1.
Products Required: Eco Cleaner
Remove loose particles/dirt. For the gentle cleaning of décor and plastic surfaces. Removes most common household soilings. Also suitable for the basic cleaning of wood and UPVC windows.

Step 2.
Products Required: Edge Planner
Remove damage edges using the Edge Planer so that no sharp edge will be left. To cut off damage edges on decor surfaces. The rounded side of the Edge Planer is used to level damage edges on solid wood and veneer.

Step 3.
Products Required: Edge Planner
Compress damaged edges using the round side of the Edge Planer.

Step 4.
Products Required: Hardwax & Gas Hot Knife
Choose several colour shades of Hard Wax (light/medium/dark) corresponding to the surface and hold Hard Wax sticks in turns to the hot tip of the Hot Knife. Let colour wax mixture flow into the damage in the direction of the grain.

Step 5.
Products Required: Special Fillers Applicator & Wire Wool
Remove surplus wax with the Special Fillers Applicator. Note: Sharp grooves on the flat surface, round grooves at edges Shiny spots can be reduced either by using Wire Wool or Sanding Pad, coarse.

Step 6.
Products Required: Special Repair Lacquer PLUS & Graining Pen
Make an intermediate sealing by misting with Special Repair Lacquer PLUS from a distance of 30-40 cm – do not spray too wet. Restore the grain with the Graining Pen after lacquer is dry. You can apply multiple layers of graining pen and lacquer to develop darker colours.

Step 7.
Products Required: Special Repair Lacquer PLUS
Make an intermediate sealing by misting with Special Repair Lacquer PLUS from a distance of 30-40 cm – do not spray too wet. Restore the grain with the Graining Pen.

Product Used:
Special Repair Lacquer PLUS: https://www.konigaustralia.com/product-page/special-repair-lacquer-plus
Graining Pens: https://www.konigaustralia.com/product-page/graining-pen
Special Fillers Applicator: https://www.konigaustralia.com/product-page/special-fillers-applicator
Hardwax: https://www.konigaustralia.com/product-page/hard-wax
Gas Hot Knife:https://www.konigaustralia.com/product-page/hot-knife