

Damaged a tile or drilled the wrong hole?
- Nov 13, 2017
- 2 min read
One very common cause for damages in the bathroom are from drill holes. These drill hole generally occur when drilling in the wrong area or not drilling directly through and causing more damage on your tile.
We have some tips and tricks allowing you guys to benefit more from using our Picobello products in terms of applying the right way so the material (wax’s) meld better into the damage or hole, taking excess product off the damage and touching up the finished surface for perfect colour corrections.
Follow these Steps to ensure the best quality repair capable for our products:
1. Preparation: The damage area has to be clean, dry and free from grease.

2. Filling: Use the hot tip of the Hot Knife to apply Ceramic Filler of the matching shade to the damaged area. Always work from light to dark. To match the right shade, different colours can be intermixed. Clean the tip of the heating iron after use.

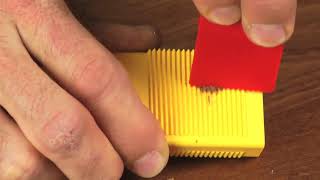
3. Levelling: Use the Transparent Special Fillers Applicator to strip off excess material. Important: Do not use a metallic tool, as this would create metal abrasion and the filled area would turn dark.

4. Colour corrections: can be made by repeating the previous stage (with the desired colour) and again removing any surplus using the Special Fillers Applicator. With even and high-gloss surfaces, fill small pores with transparent filler and again remove excess material with the Special Fillers Applicator.

5. Cleaning: Clean the area with a cloth and Eco Cleaner.

6. Sealing: Seal the dry, repaired area with the Brush Pen Clear Lacquer (high-gloss or matt finish). The only exception is for white high-gloss surfaces. These should be sealed with the relevant highgloss Brush Pen Covering Lacquer (colours can be intermixed).

7. Gloss Sheen Adjustment: When the sealed area is dry (after approx. 4 hours at room temperature) a final gloss sheen adjustment can be made with the Sanding & Polishing Cloth. The white side of the cloth reduces the sheen level while the green side polishes.

In Conclusion,
If you have purchased a Picobello kit and use these methods, we ensure the best finish possible from a DIY perspective. When looking at our range of DIY kits, we have recommendations that you should follow because we want you to not replace you tiles, but repair it!
Take a further look at our extensive tip guide for all sorts of damages around your home.


Comments