Dyeing Damaged Laminate Edges
Laminate has been a savoir for any builders out there. It's fairly cheap and provides good finishes for all different ways to apply it. unfortunately the pricing of the product more or less dictates in this instance the quality of the product.
We see a lot of laminates have a major issue around the joints, edges and corners are. the reason for this is that its two flat pieces of laminate coming together. Over time, the laminate pieces will separate in normal use. The most extreme case is when the laminate is in a kitchen for example, and there is water, food and oil that works its way into the laminate.
The separation can be large shown in this example below.

This is definitely an extreme example but none the less, important to know. Furthermore, the most standard separation between laminate is 1 to 2 mm. We can fix this very easily.
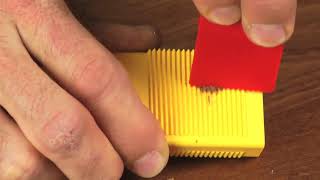
Step 1.
Products Required: Liquid Sandpaper
For the gentle removal of filler residue and to degrease surfaces prior to retouching/adjusting the sheen level. Note: This product has a slight dissolving effect. We recommend to test the product on an inconspicuous area first to ensure compatibility with the surface.
Step 2.
Products Required: Premium Edge Pen
The innovative Premium pen for the covering colouring of corners, edges and grooves on wood and décor surfaces in interior and exterior areas. D
ries quickly, wipe-resistant, scratch-proof and overcoatable. Optimized acrylic-based lacquer quality for a continuous lacquer flow.
The parts to be coloured must be dry and free of dust, silicone and grease. Prior to each use, shake pen for about 30 seconds. Rattle of mixing balls must be clearly heard. Due to exterior influences (heat), an overpressure may develop in the pen. To prevent blotching during activation or pumping, the pen must be de-aerated.
Take off cap and hold pen with tip pointing upwards (preferably in a cloth). Pen is audibly de-aerated by briefly squeezing area marked 'P'. Hold pen with tip pointing downwards and press slightly until tip is soaked with dye. Touch-up with rapid strokes. When used in outdoor environments, it is vital to apply thicker layers of lacquer. When working on windows and doors, do not use in the gasket area. When lacquer ceases to flow well, press again or touch down tip at a flat angle (about 45 degree) with light pressure.
The valve opens ensuring a well-measured and constant lacquer flow. Avoid squeezing 'P' during application, as this may result in an uncontrollable lacquer flow. Replace cap after use. Dried up tips can be washed out in nitrocellulose thinner. If the pen has not been used for a long time or where pigment separates at the tip, just replace with a new tip
Products Used:
Premium Edge Pen: https://www.konigaustralia.com/product-page/premium-edge-pen
Liquid Sandpaper